If you’re working on our Lime Green Project and plan to make the top or the entire quilt, you might like to read over these tips.
First, when choosing my strips and strings, I like to use a variety of tone on tone brights mixed up with novelty prints to make a fun quilt for a child.

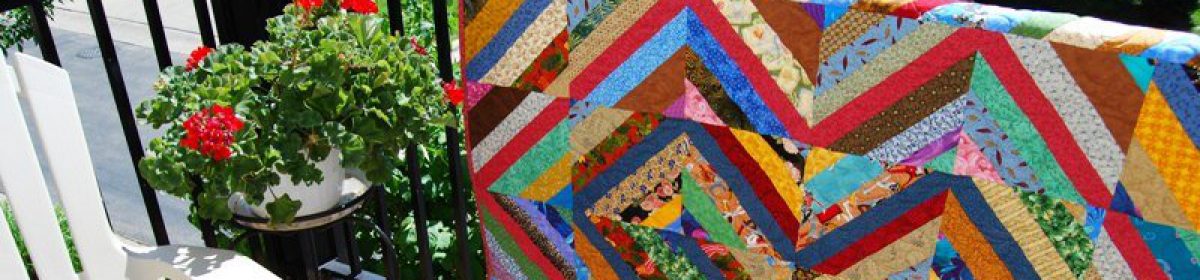
Our typical HeartStrings quilt for a child uses 24 blocks, set 4 x 6 and I like to add a border although many of our members find this 36×54 size perfect for their purposes. (See guidelines for piecing the blocks). For our Feb/March project we’re substituting a LIME green center string for our usual RED or BLUE.
Once I have all my blocks pieced I assemble the top in 4 block sections – each group of blocks create a diamond so I don’t have to worry about turning one of my blocks the wrong direction.

A walking foot makes it easy to sew through the extra layer that the muslin adds.

I use a slightly generous 1/4 inch seam and press them OPEN to decrease bulk. You’ll find it much easier if you’re going to quilt the top yourself and if not, the volunteer quilter will thank you!

Once all my blocks are sewn into the 4 block sections I assemble them into rows and sew the rows together.

If this size suits your needs you’re done — I always add at least one border to these small quilts — cutting it between 4.5 and 5.5 inches depending on the size of my print or my mood that day. Occasionally, I even add a small inner border. Today, I cut this border 5 inches and it will finish at 4.5 inches for a quilt that is 45 x 63 inches.

At this point, you could send the top to us to quilt and donate or if you are going to quilt it yourself, you could do a simple meander, you could tie the quilt, or if you’re like me, you can play with some fun overall quilting designs. I will choose one of my favorites from the Pajama Quilter DVD to quilt my top.
")

Thanks for the mini- tutorial. i am planning to try some of your quilting ideas on my next quilt.
LikeLike
I don’t have the space to sandwich a quilt, but I sure can sew the blocks together. Thank you for the tute!
LikeLike
Thanks for these very clear instructions and great hints. Very timely!
LikeLike
Thanks for the tips. I have assembled a number of the blocks and started sewing them together before I read your hints on assembly. I was a bit frustrated with using my regular presser foot, so the idea of using a walking foot is quite welcome. I will try that, and I bet it will make a huge difference.
LikeLike
Thanks for the reply, I don’t know how you do all that you do.
LikeLike